Create an Azure Internal and External Load Balancer (step-by-step) by Kevin Kershaw
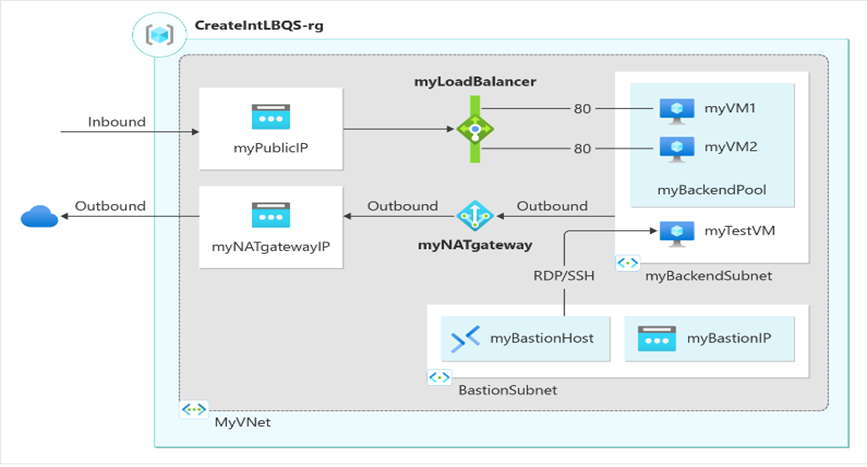
We will start with the Azure Load Balancer by using the Azure portal to create a public load balancer for a backend pool with two virtual machines. Additional resources include Azure Bastion, NAT Gateway, a virtual network, and the required subnets.
#1 Sign into the Azure portal

In the search box at the top of the portal, enter Network Security Group
Select Network Security Group in the search results.
Then select Create

Type in the name of the network security (** Always put NSG within the name**)
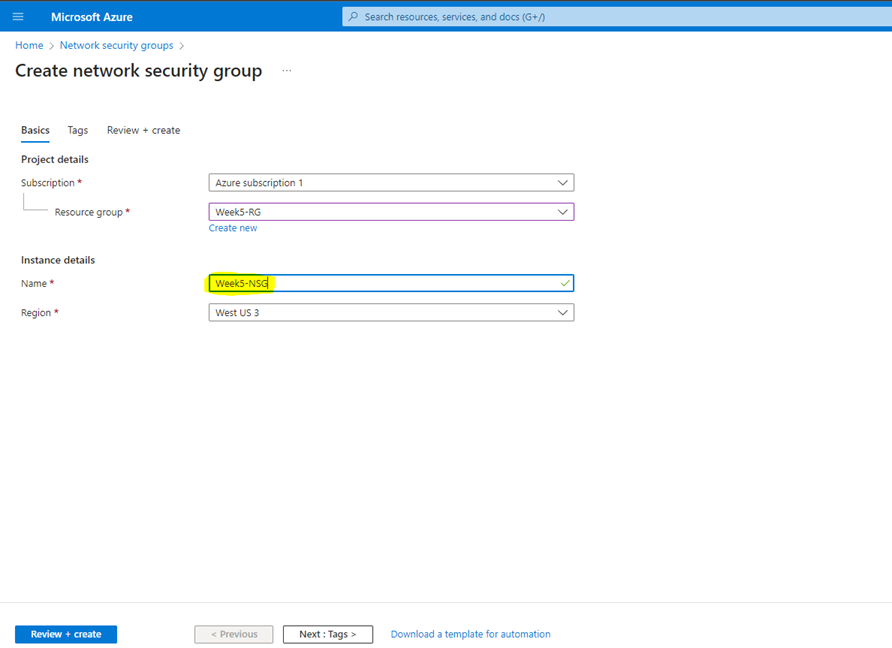
Proceed to Tags then review then press Create
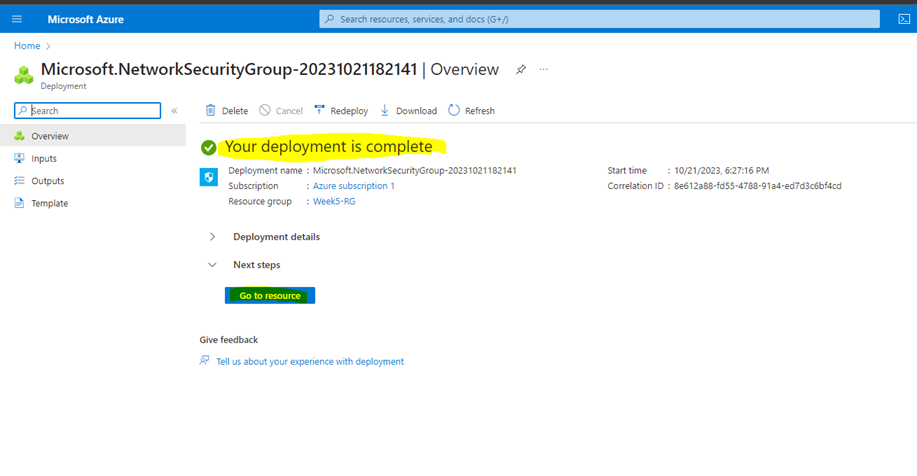
Once the Network Security Group has been created then click on Go to Resources
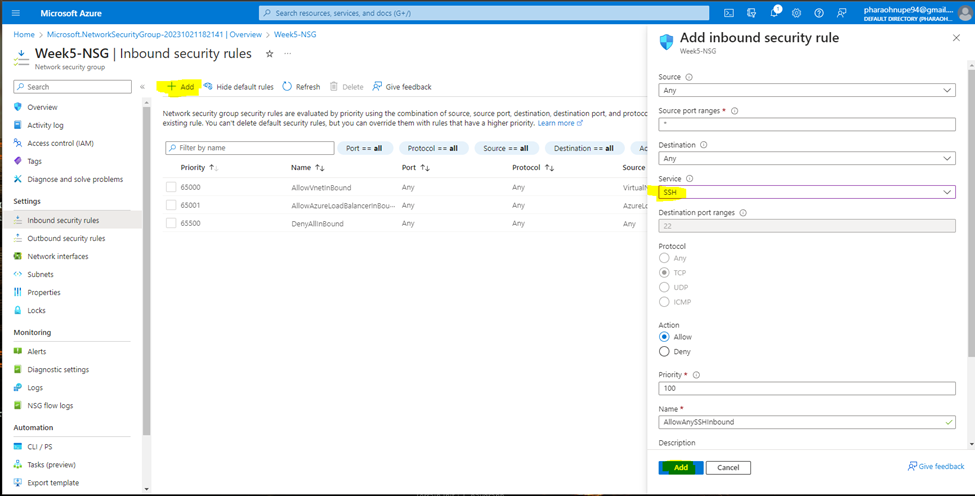
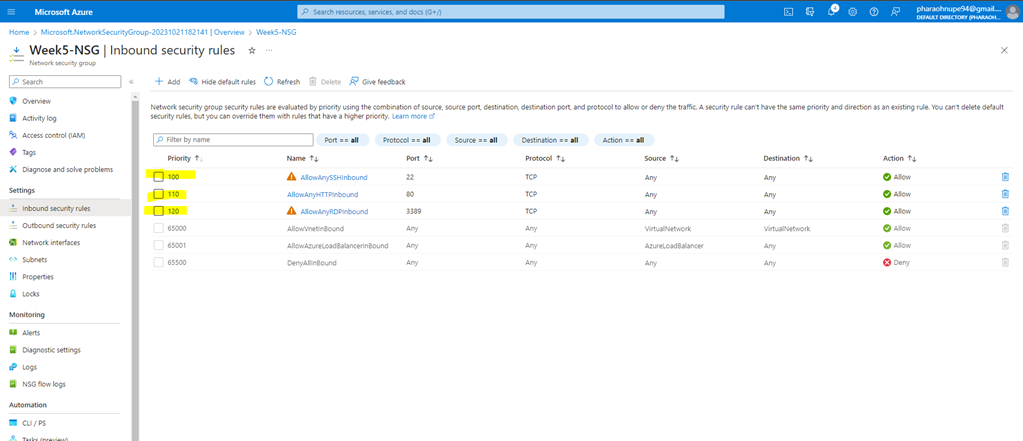
** DO NOT MODIFY THE OUTBOUND SECURITY RULES**
Select the Inbound Security Rule then click on ADD and type in the inbound security rule
You will create one for SSH, HTTP and RDP
** Add Description Example** My HomePage for HTTP and MyWindowBox for RDP
Once all the rules have been created then look over them.
The reason for the numbers jumps by 10 is to allow you to add additional rules
** NSG is required while configuring the Virtual Network **
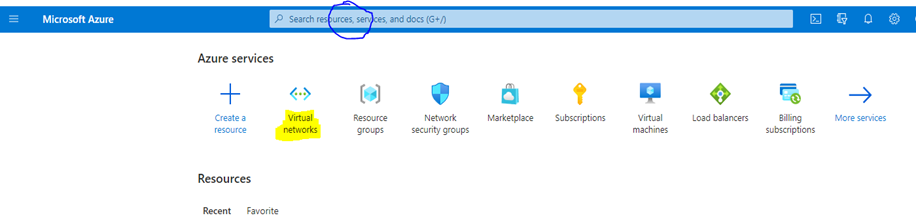
In the search box at the top of the portal, enter Virtual network. Select Virtual Networks in the search results.
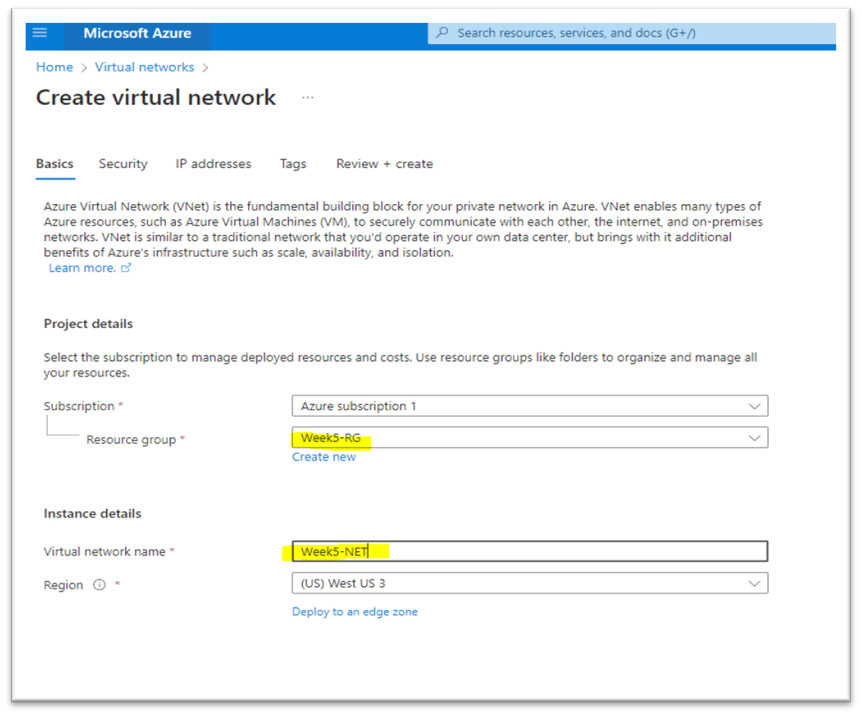
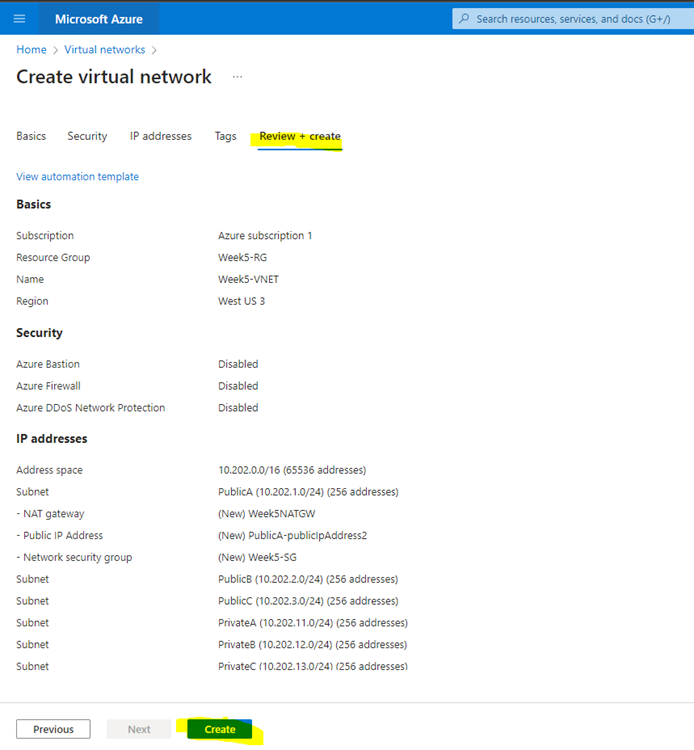
#3 In Virtual networks, select + Create.
- In Create virtual network, enter the network information. *Resource group will automatically appear within the field then type in the virtual network name then click on Next
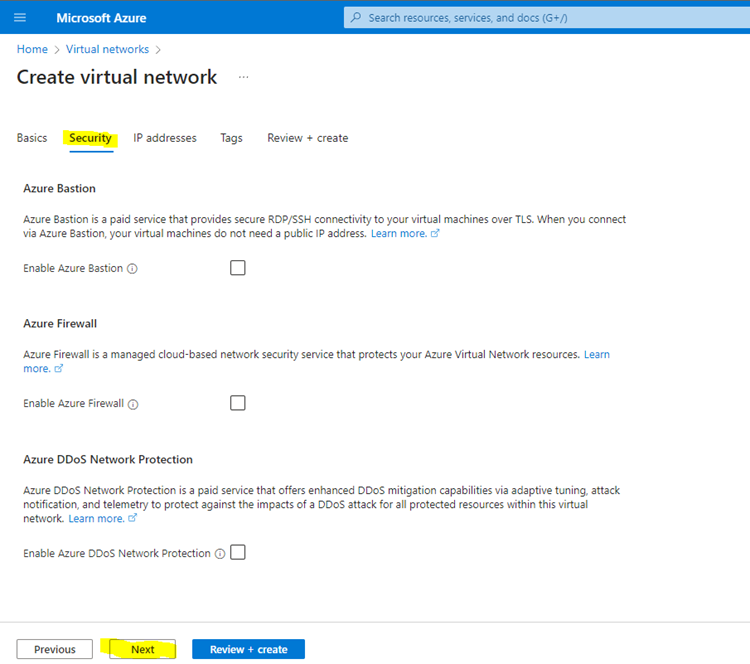
- There is nothing select in Security then click on Next
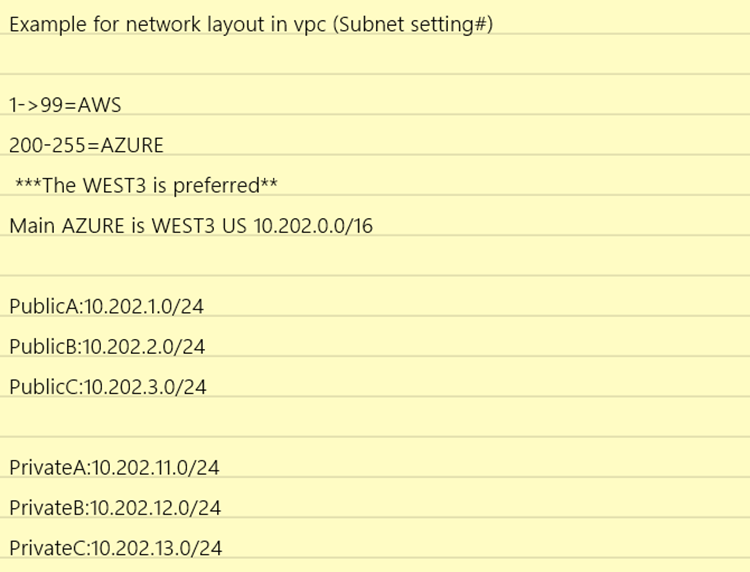
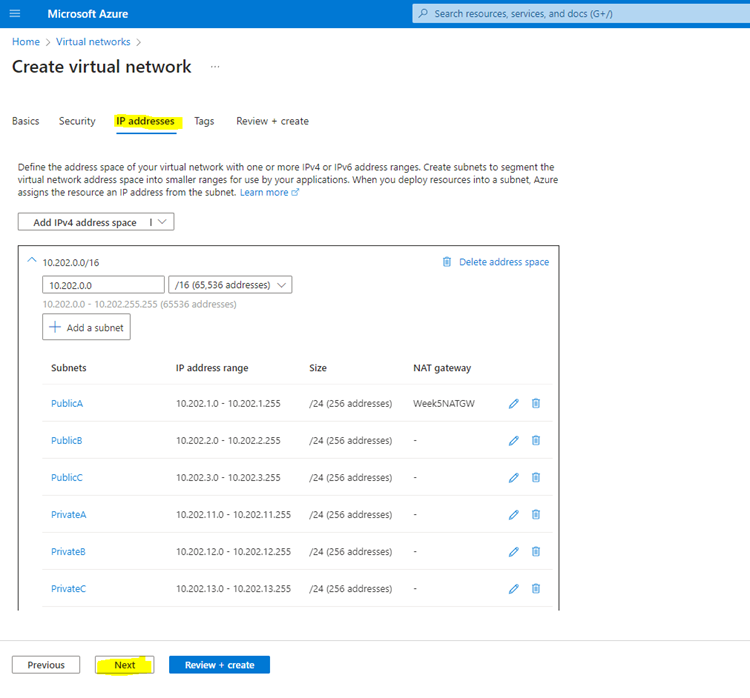
#3 This is section is where you will configure you IP address then Add your Subnet
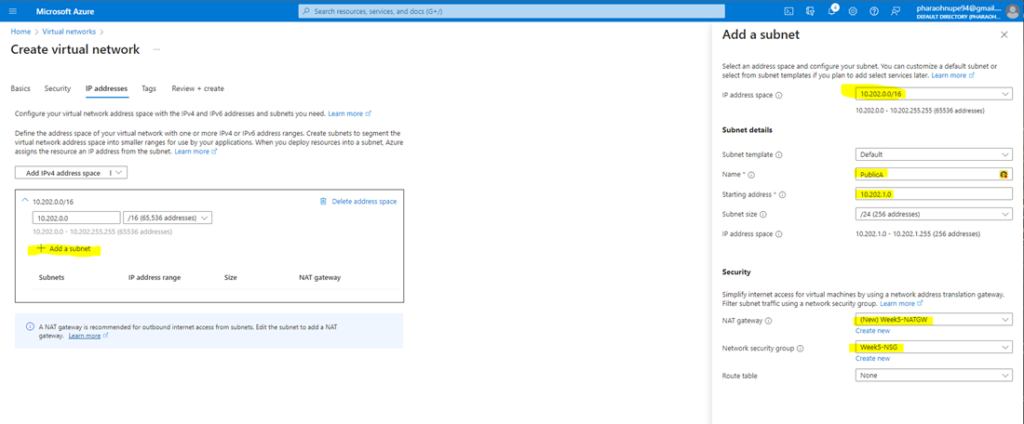
**Please use your planning document** (Subnet setting #)
All Subnets has been added then Press Next
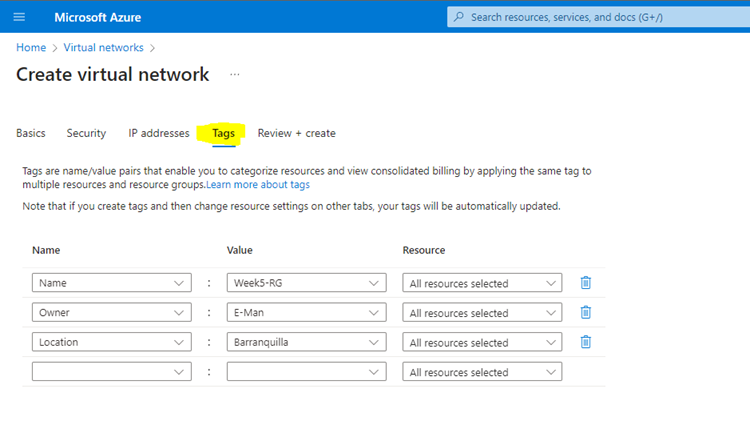
Next step is add TAGS then press NEXT
Review then once validation is completed then select Create
Deployment is completed then goto Resources
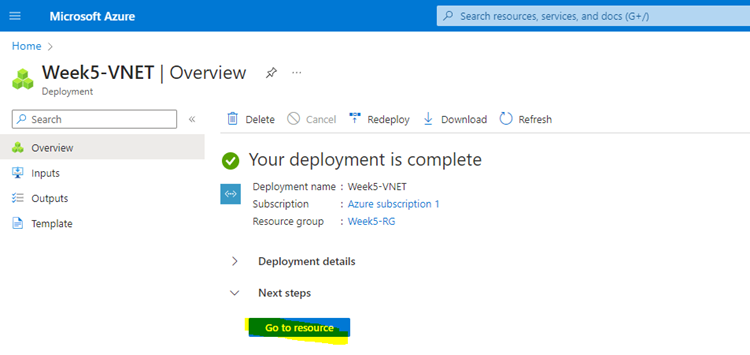
The virtual network and subnet are created immediately. You can proceed to the next steps and create the load balancer
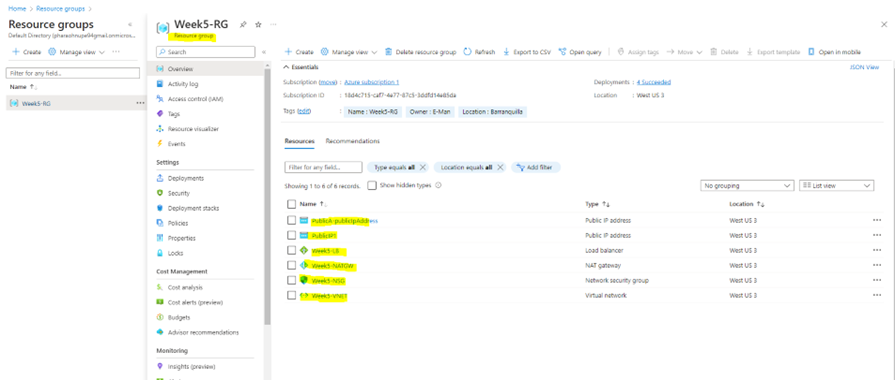
Go back to the Resource Group and confirm your Resources then you can create your Load Balancers servers
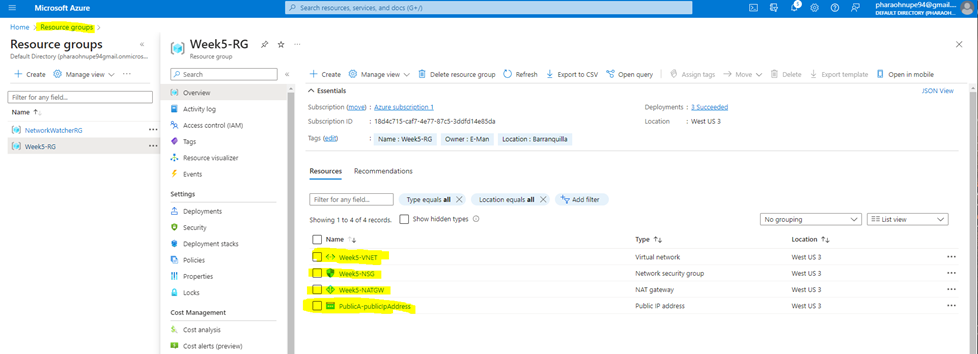
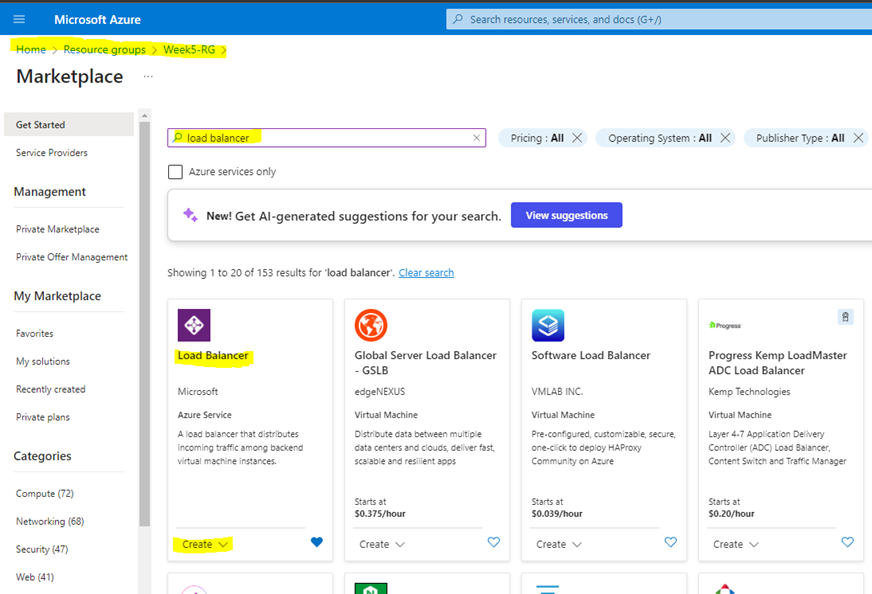
Click on Create in your Resource Group and select Marketplace and search Load Balancers
Once you get to the load balancer then Select Create
Next you will fill in the information needed for setting up the load balancer
The Resource group and Region will automatically appear in the selection field below
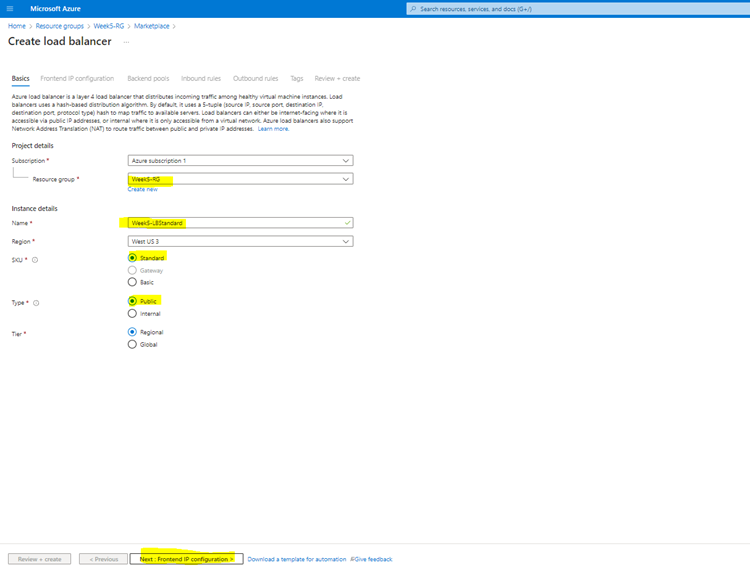
For Types select if the Load Balancer will Public or Internal Then proceed to Frontend IP configuration
In Frontend IP configuration, select + Add a frontend IP configuration.
Next select Create New for the Public IP Address and type in the name of the Public IP address
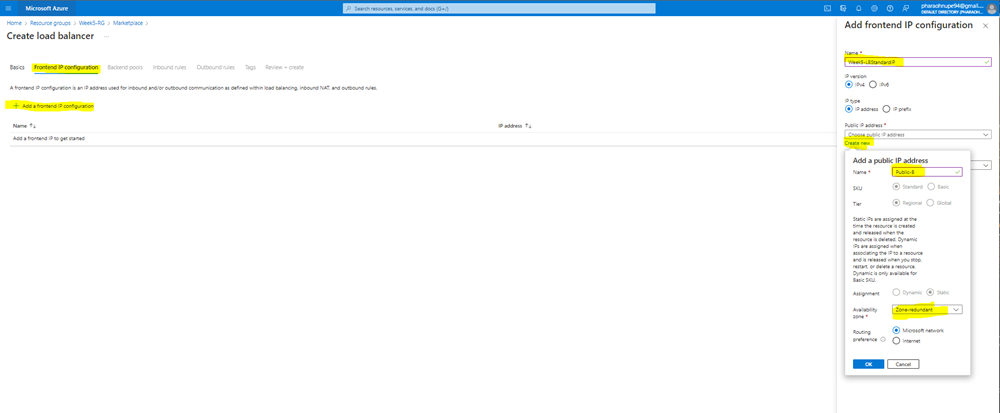
Select Next to Backend pools
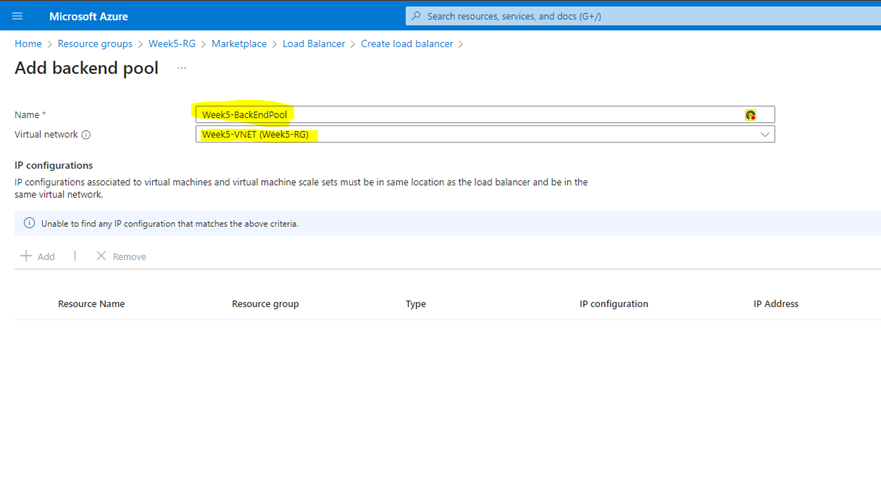
Type in the Name of your backend pool then your virtual network that you created should automatically come up for Virtual Network then press Save
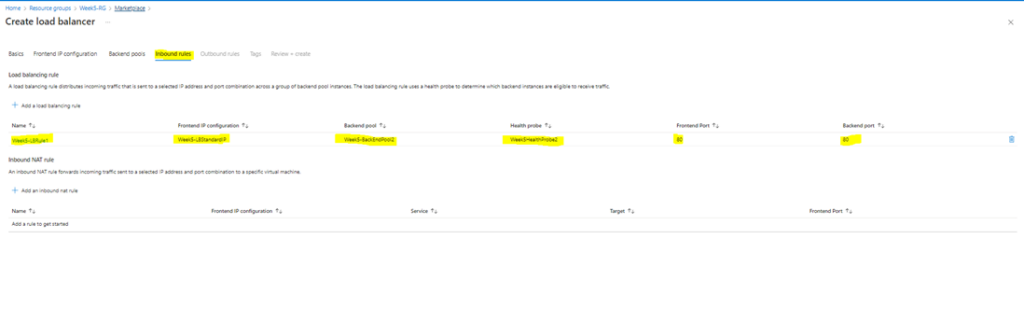
Click Next for Inbound rules.
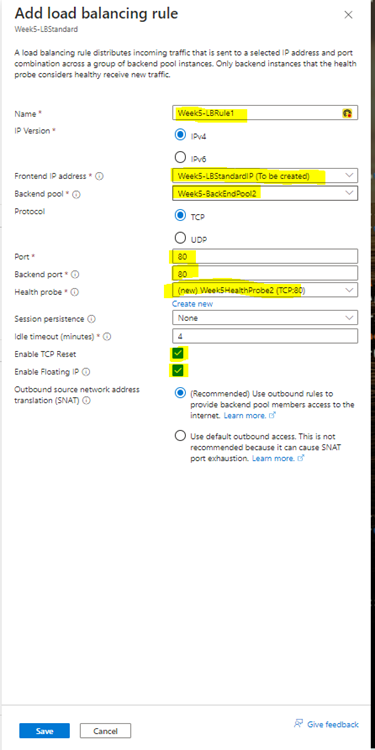
Select Add a load balancer rule
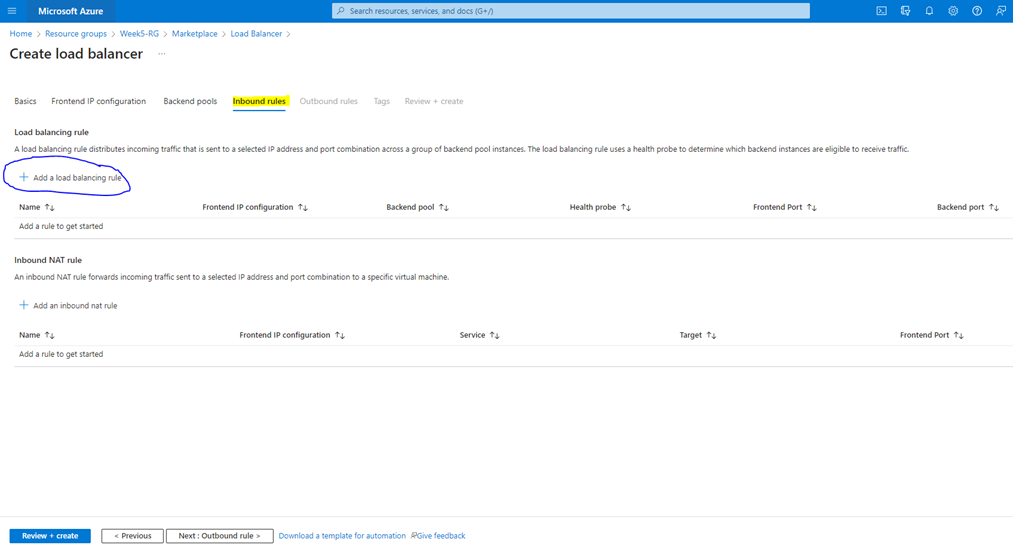
Add in the Name for the rules (Example Week5-LBRule1) and the Port information and you will need to create a Health Probe and select the Enable the Floating IP box below the save it
Click Next to Outbound rule
<DO NOT EDIT OUTBOUND RULE>
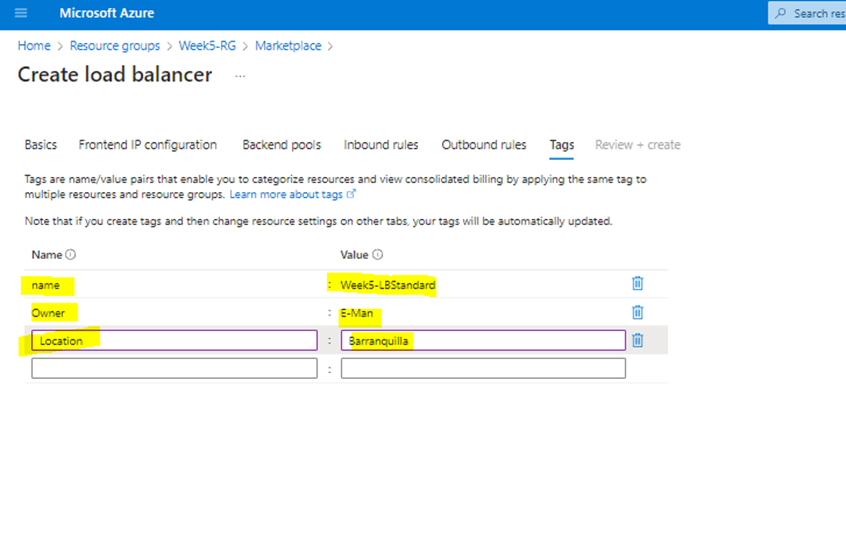
Click TAGS
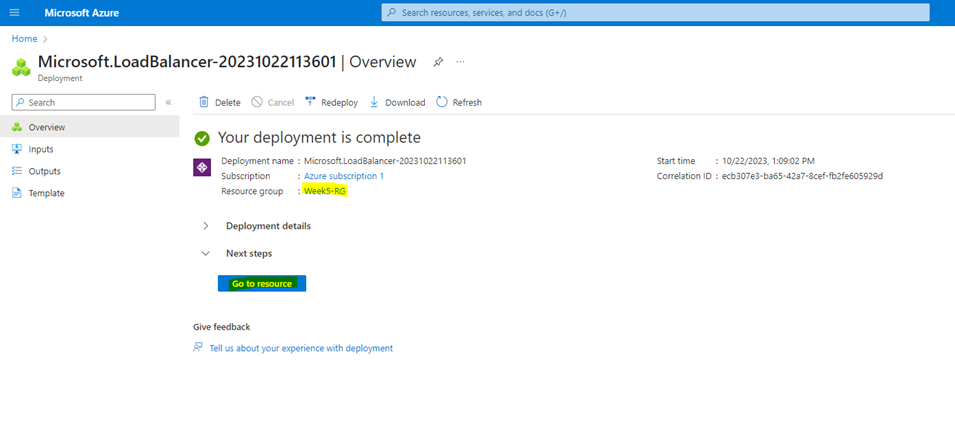
The select CREATE
The Load Balancer Deployment is completed below
Next click on Home and go to Resources Group and confirm your resources below
Next step now is to create your virtual machines. Select CREATE on your Resource Group and type in virtual machine and you will select virtual machine scale set below
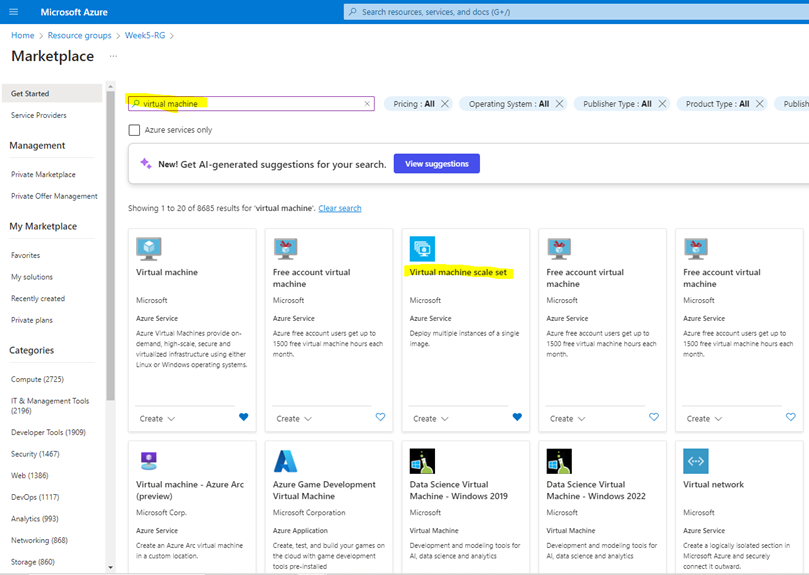
Once you select the Virtual machine scale set then select Create
**The purpose of selecting the Virtual machine scale set is because your purposed is for using a load balancer**
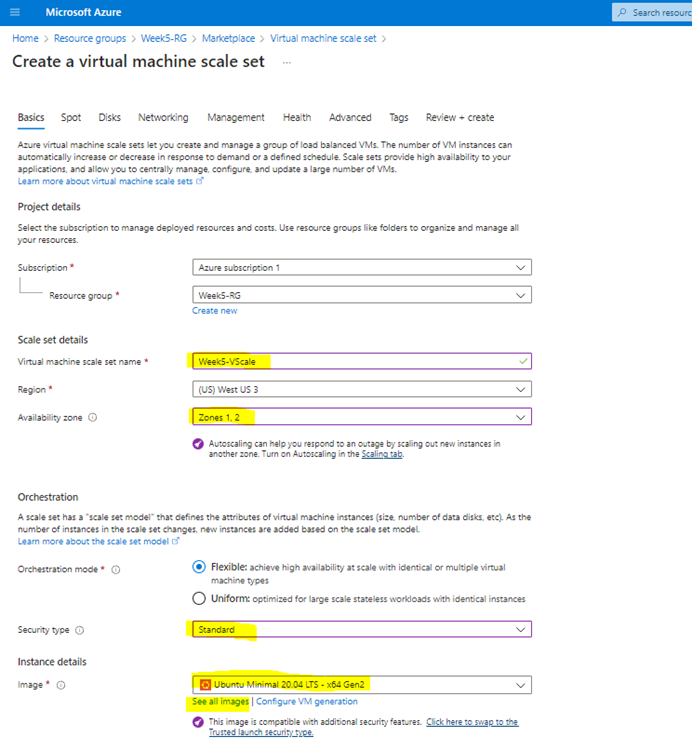
Type in the name of your VM scale set, Zones
Security Type (Only select Standard for (labs))
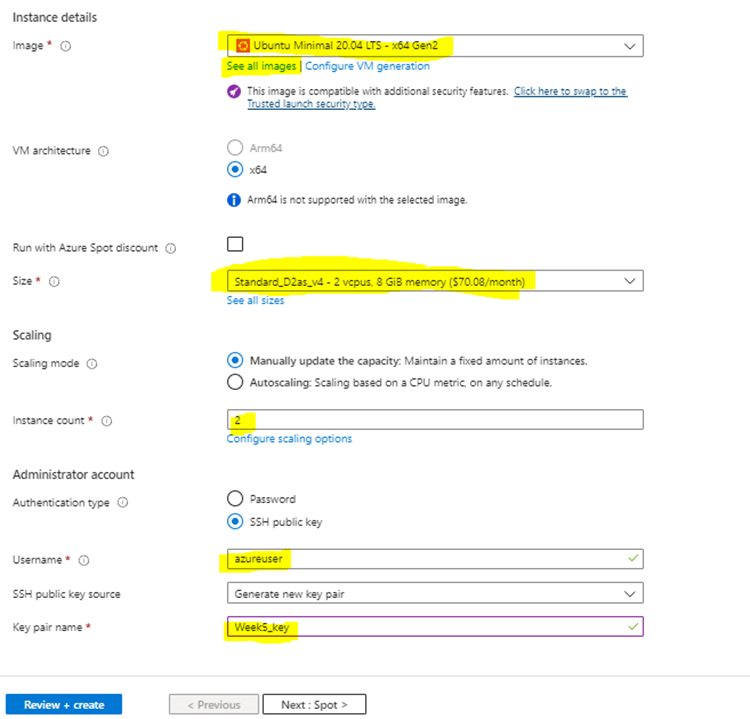
Above Select you Image and keep the default size for the operating system
** For example, Standard_D2as_v4 – 2 vcpus, 8 GiB memory ($70.08/month) **
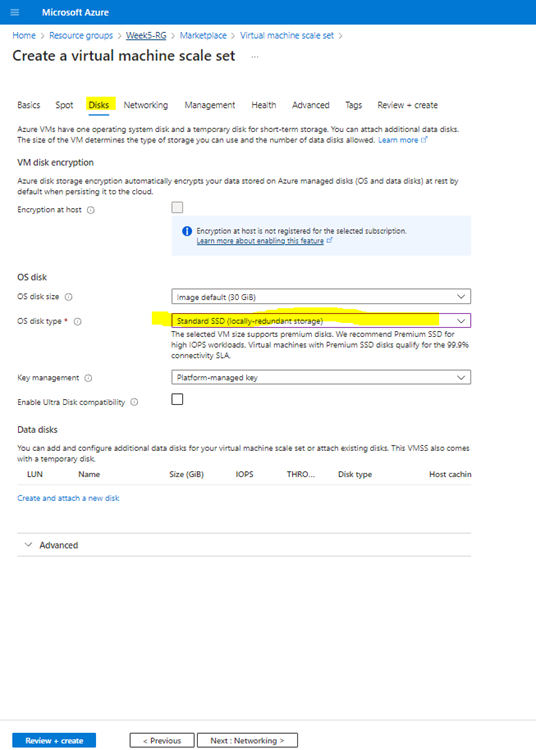
Select Spot. There is nothing to editing in this Spot section so proceed to Disk
Select the Standard SSD below then go to Networking
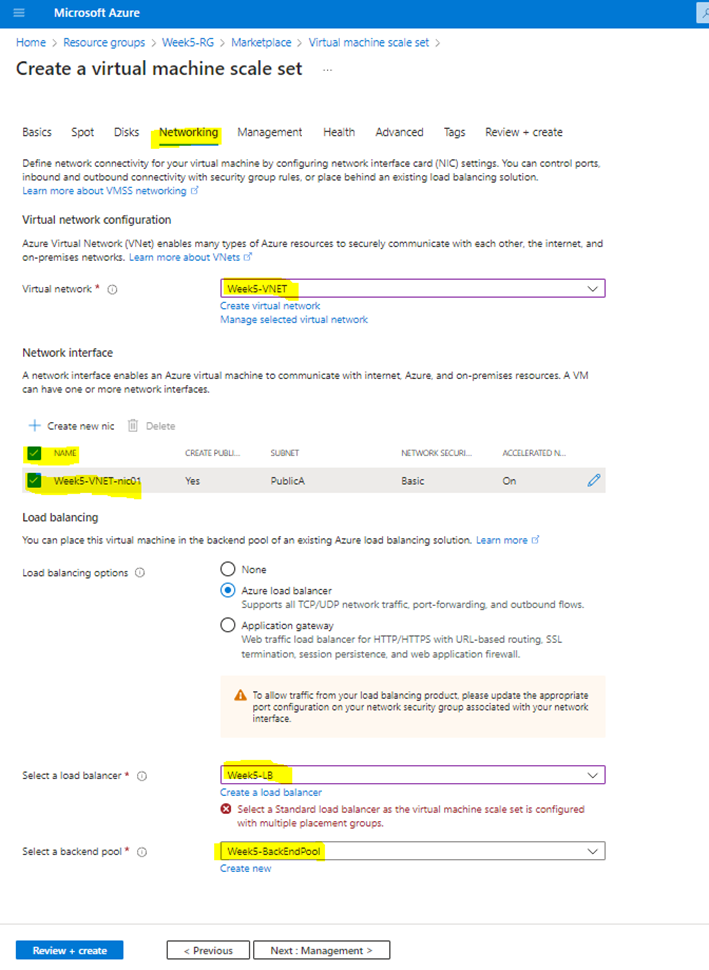
In the Networking section select you Virtual Network in the list below and make sure you check the boxes on the Network Interface
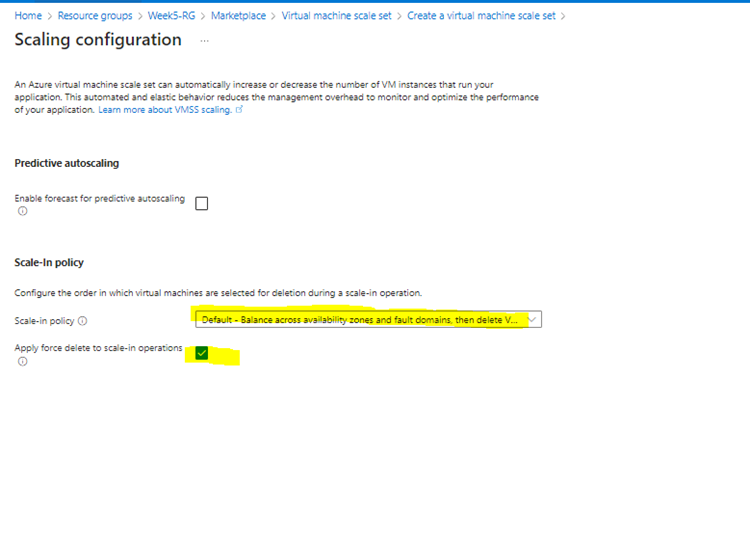
Next configure your Scaling Configuration and click Save
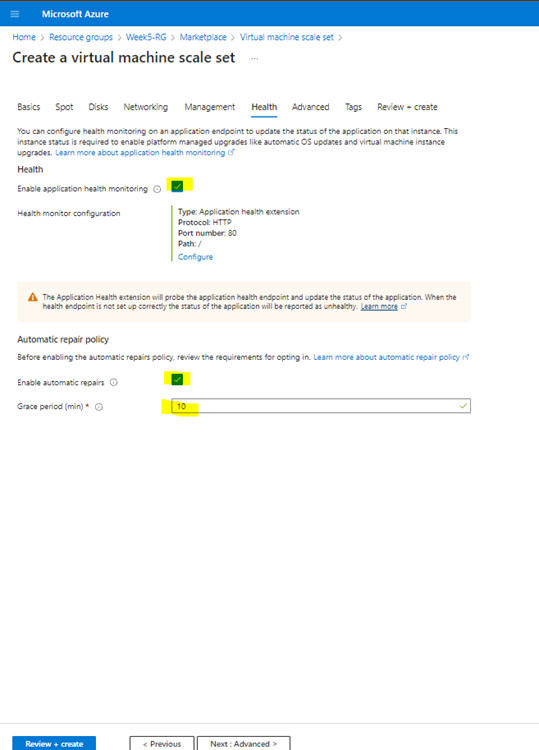
Save then select Next for Health
Check the box on Enable application health monitoring
Check the box on Enable auto repairs
Grace period default is 10
Click on Next to Advanced
This section you can select Spreading Algorithm based off your needs Max or Fixed spreading
Next youhave the option to add VM application
Select user data then past in the script that was provided named “azure_ubuntu_apacheWeb.txt”
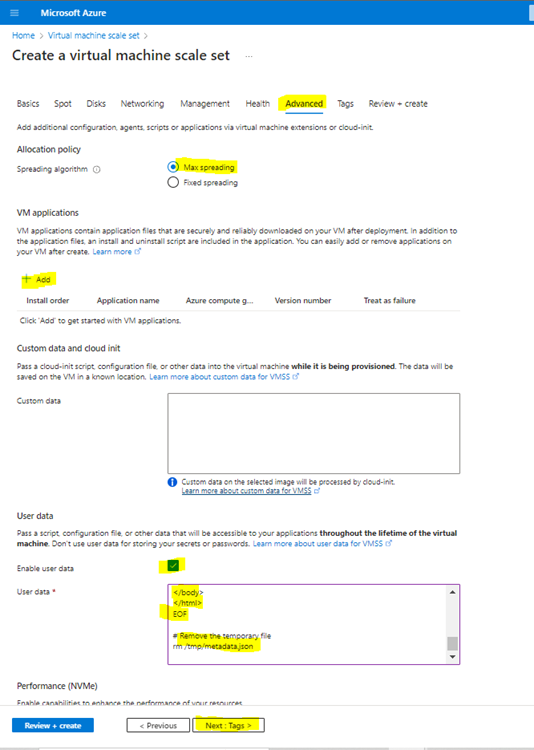
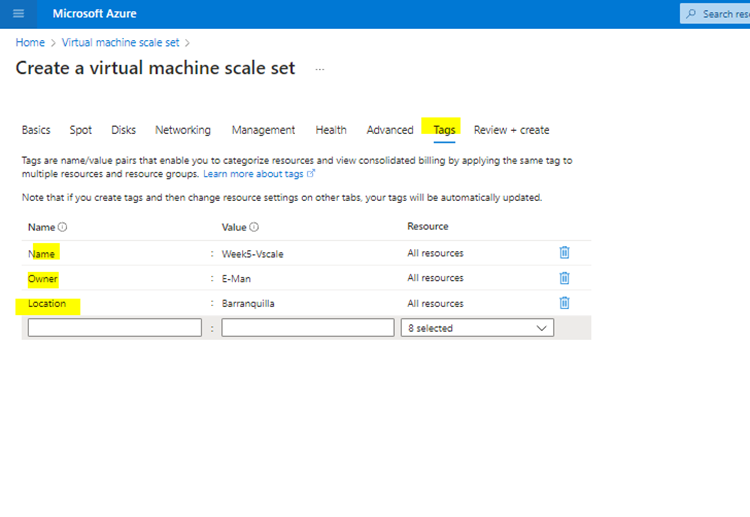
Then proceed to Tags and enter the information that’s needed
Review + Create then select Create
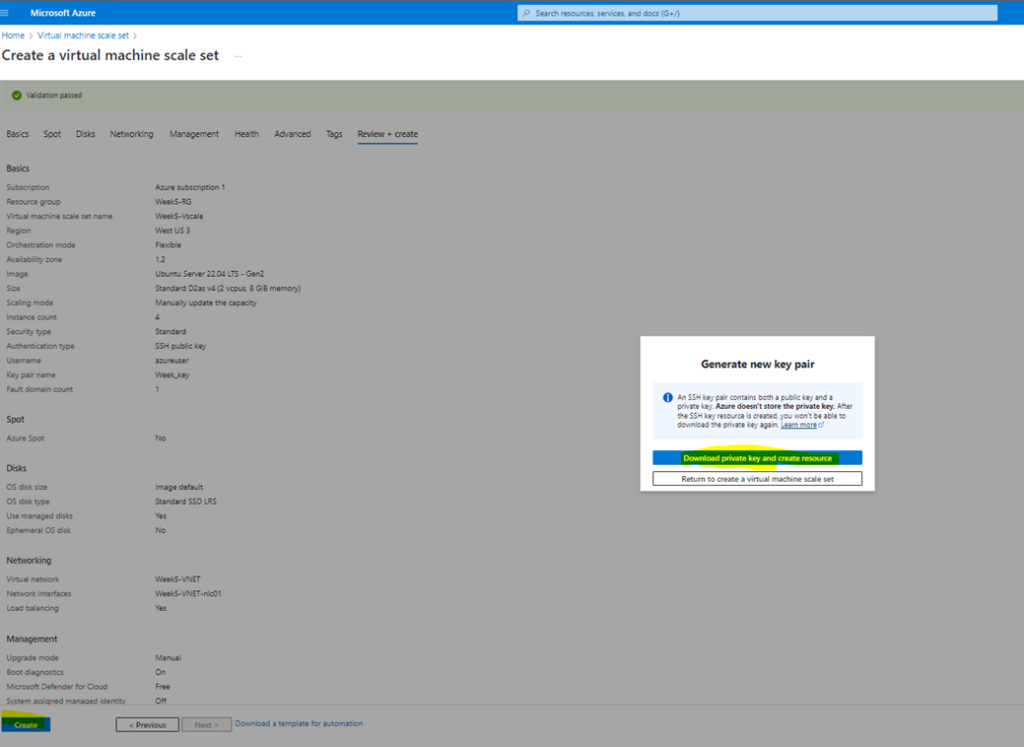
Then select Download private key and create resource
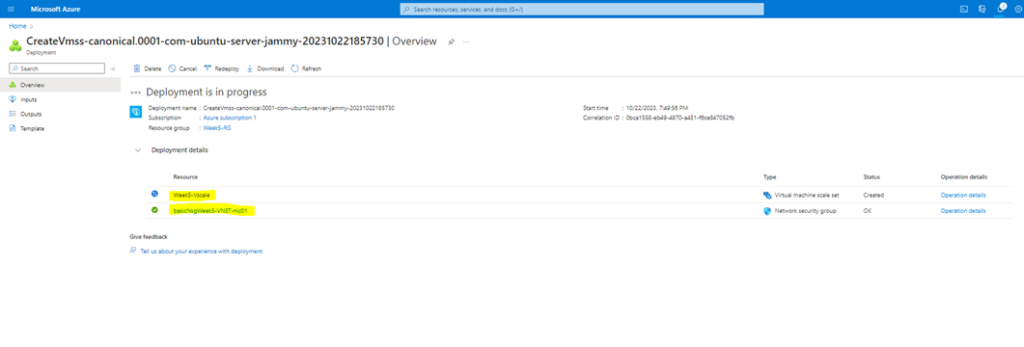
Once done then you should ”Your deployment is complete”
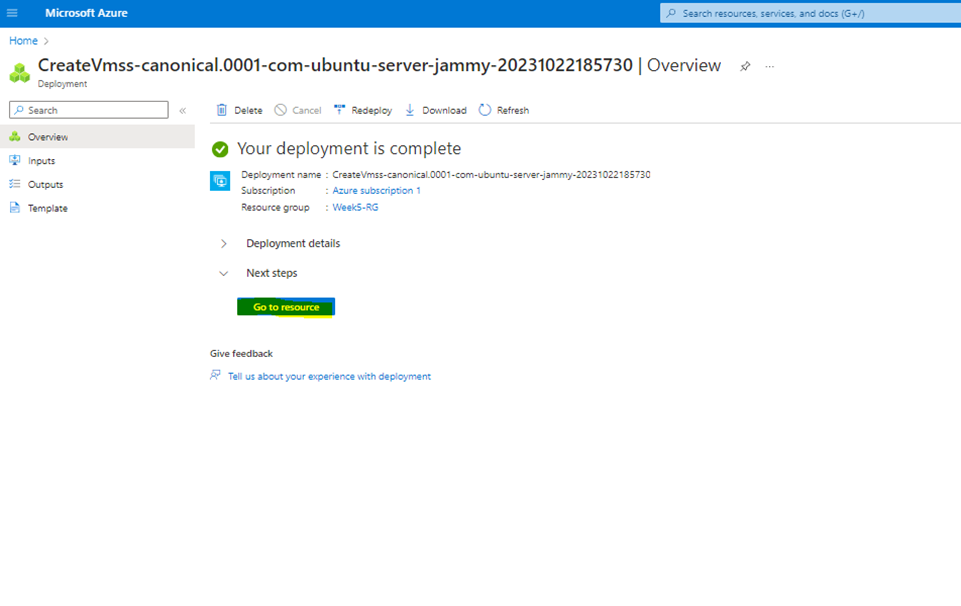
The Goto your Resource Group and review the results
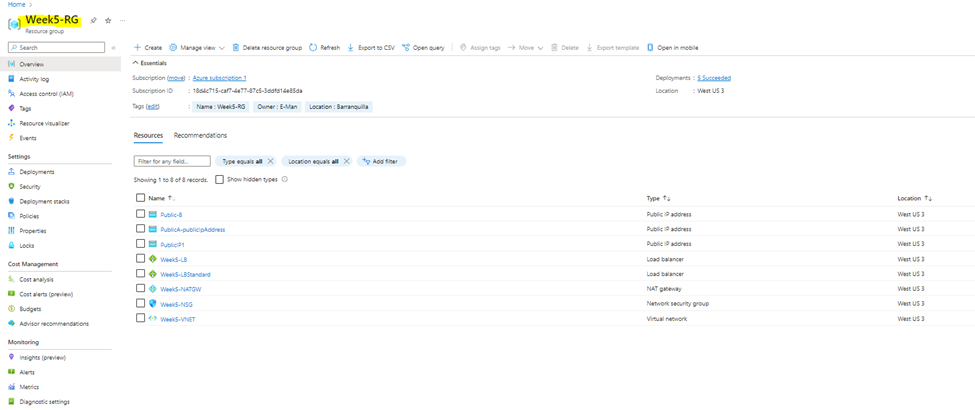
The go to Load Balancing and review your LB’s

Leave a Reply